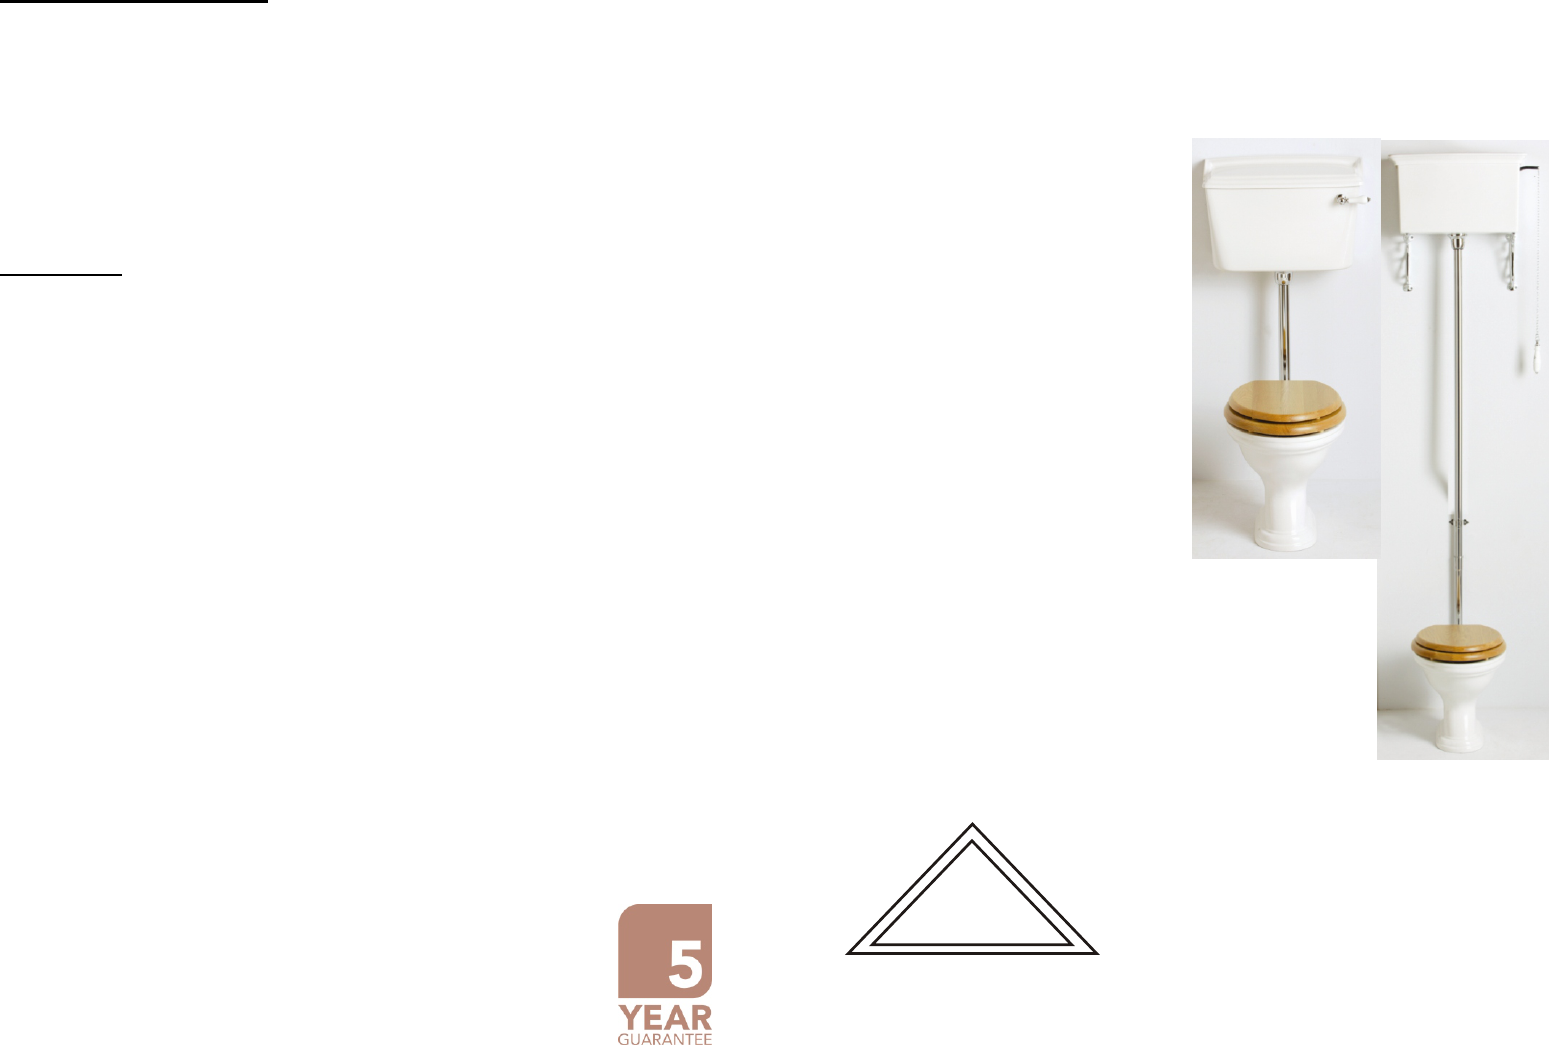
Low & High
Cistern Packs
Fitting Instructions
& Contents List
Please keep these instructions for future reference and request of replacement
part
AFTERCARE INSTRUCTIONS
Your fitting has a high quality finish and should be treated with care to
preserve the visible surfaces.
All surface finishes will wear if not cleaned correctly, the only safe way to clean
your taps is to wipe with a soft damp cloth. Stains can be removed using
washing up liquid. All bath cleaning powders and liquids can damage the
surface of your fitting even the non-scratch cleaners.
GUARANTEE
All products are manufactured to the highest standards and a 5-year
guarantee covers any defect in manufacture.
Before starting any installation project please consider:
Prior to drilling into walls, check there are no hidden electrical
wires, cables or water supply pipes with the aid of an electronic
detector. If you use power tools do not forget:
- Wear eye protection
- Unplug equipment after use
SAFETY
NOTE
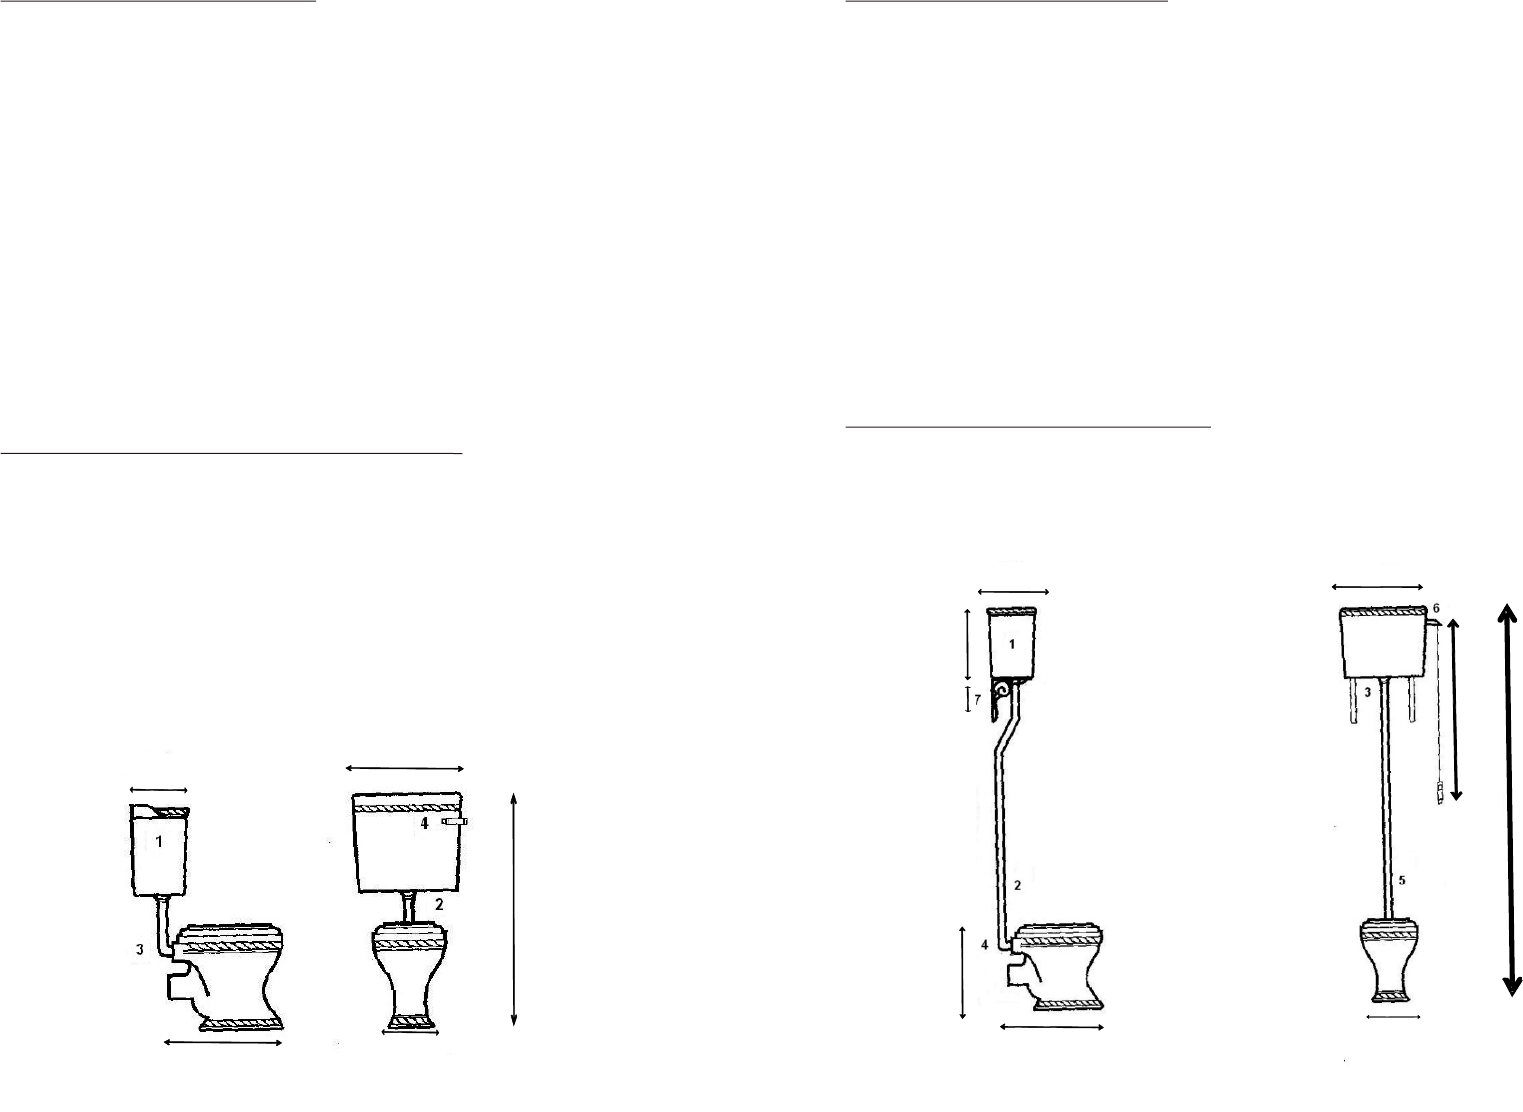
LOW LEVEL CISTERN INSTALLATION
1. Mount the cistern securely on the wall at the required height using the fixing
holes through the rear of the cistern (N. B. The cistern lid must be situated a
minimum of 1 metre from the floor to obtain a satisfactory flush.) See HANDY
HINT (Below).
2. Place the ornate shroud and retaining ring (thinner of the two supplied)
over the top of the flush pipe and insert into the threaded syphon stem
(supplied as part of the cistern fittings). Once this is secure, push the ornate
shroud up to cover the fittings and secure with the retaining ‘O’ ring.
3. Insert the lower end of the pipe into the pan via the multi-quick fitting (supplied
as part of the cistern fittings.
4. Pass the cistern lever through the orifice on the cistern via the threaded sheath
and secure the locking nut. Slide the plastic washer over the cistern lever from
inside the cistern, then hold all components in place by inserting the retaining
pin through the pre-punched hole in the lever and bend to prevent it from
moving. Lastly, slide the plastic fulcrum onto the lever, tighten the grub screw
and join it to the existing ‘S Hook’ on the top of the syphon. (N.B. When
installed the external ceramic handle of the lever should point towards
2 o’clock).
HANDY HINTS - (For both high and low cisterns)
1. If you are installing your cistern on an outside wall, ensure that the black rubber
spacing washer are used to create a small gap between the cistern back and
the wall. There are two reasons for this; firstly it will help to reduce the
possibility of condensation when cold mains pressure is contained within a
humid environment. Secondly, the gap will help prevent ‘thermal shock’. This is
when rapid temperature change occurs (usually overnight) and causes the wall
to contract or expand, thus cracking the sanitary ware. When fixing the cistern
to the wall it is advisable to insert the screw through a washer (not supplied) on
the inside of the cistern. This will prevent the screw damaging the sanitary ware
when the screw ‘bites’.
HIGH LEVEL CISTERN INSTALLATION
1. Mount the cistern securely on the wall at the required height using the fixing
holes through the rear of the cistern. (See HINT 1).
2. Join the two flush pipes by using the compression ‘O’ ring and nut. This will
seal the pipe and ensure that it is watertight.
3. Place the ornate shroud and retaining ring (thinner of the two supplied) over
the upper flush pipe and insert into threaded syphon stem (supplied as part
of cistern fittings). Once this is secure, push the ornate shroud up to cover
the fittings and secure with the retaining ‘O’ ring.
4. Insert the lower end of the pipe into the pan via the multi-quick fitting (supplied
as part of the cistern fittings).
5. Use the rubber nipple/buffer clip to prevent collision between the seat and pipe.
This clip will also secure the pipe to the wall.
6. Join the fulcrum to the ‘S Hook’ on the syphon (inside the cistern) and fix the
fulcrum to the cistern with the nut and bolt provided, then hang the pull
chain/ceramic handle from the fulcrum.
7. Mount the decorative brackets using the screws provided snugly under the
cistern (See HINT 2).
HANDY HINTS - (Just for high cisterns)
2. The ornate brackets are purely decorative, they should not be used as support
From the cistern. Always ensure that the cistern is firmly and securely fixed to
The wall via the fixing holes at the rear of the tank.
220
320
230
390
610
500
800
360
Base (170)
2133
Low Level Cistern
and WC Pan
510
1040
360
Base (170)
690
210
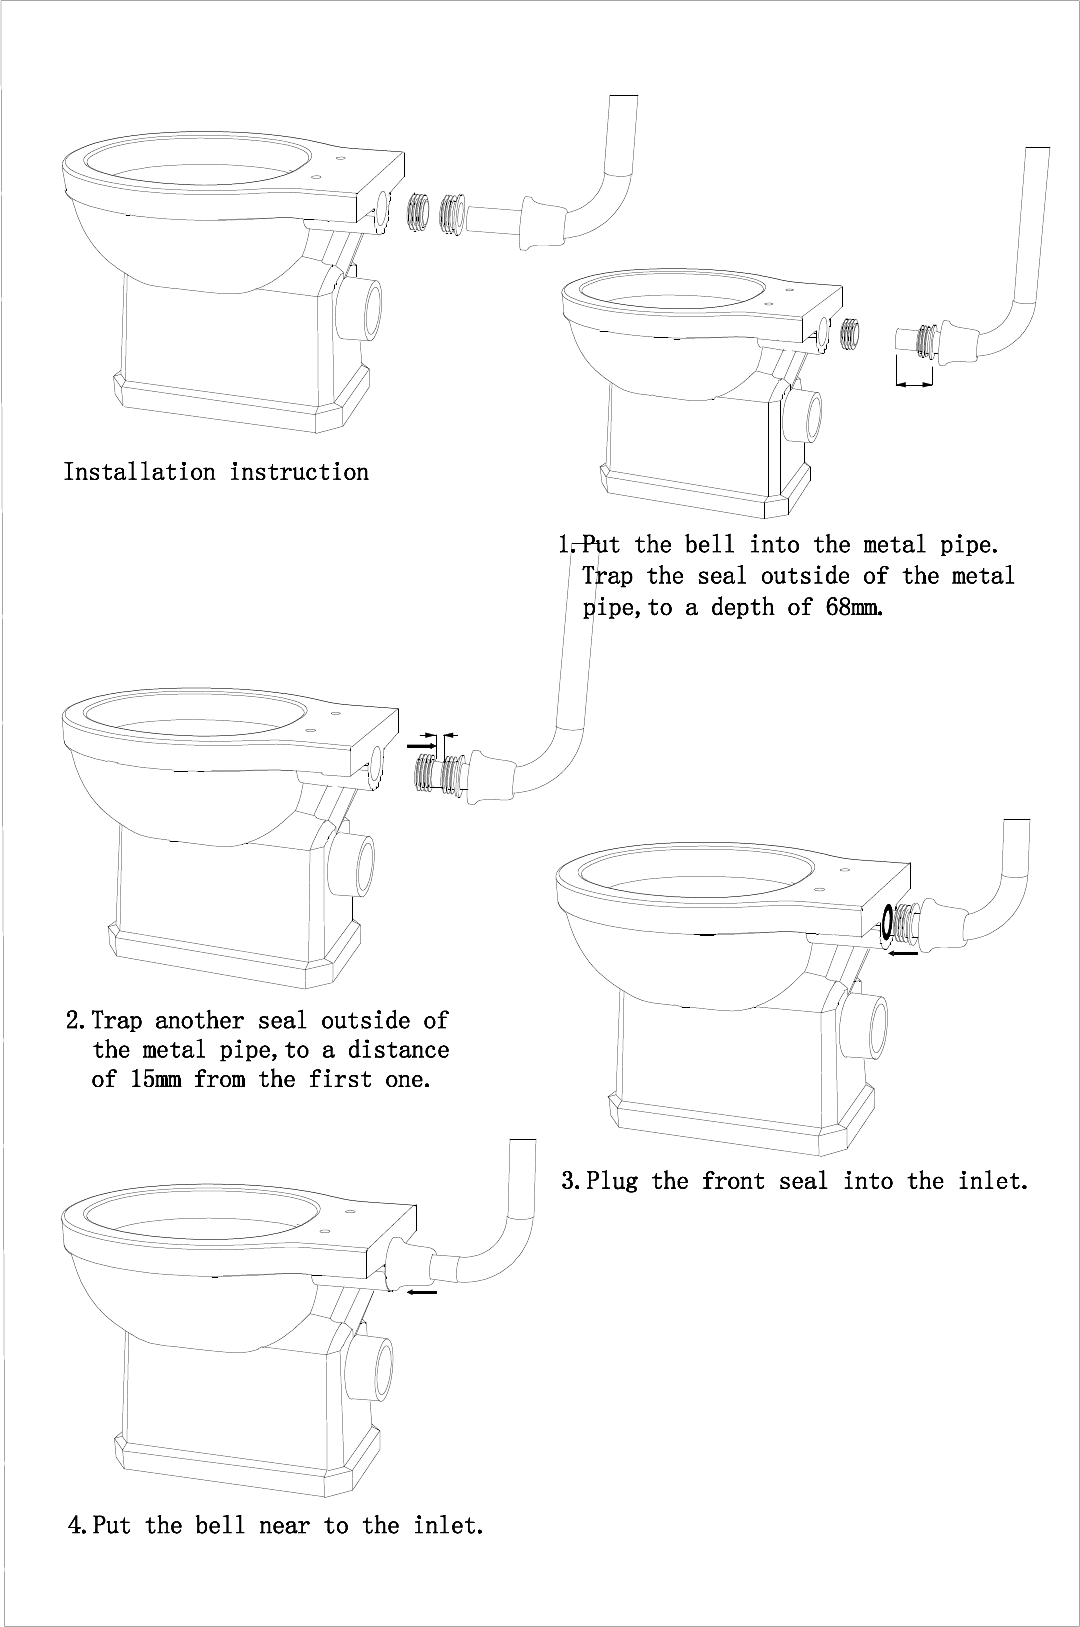
68
15